Deprecated: Creation of dynamic property WPRMenu_Styles::$wprmenu_options is deprecated in /home3/themoew1/public_html/wp-content/plugins/wp-responsive-menu/inc/wprmenu-styles.php on line 27
The Modern Day Settler https://themoderndaysettler.com Homesteading on an Antique New England Farm Tue, 05 Apr 2022 19:21:24 +0000 en-US hourly 1 https://themoderndaysettler.com/wp-content/uploads/2020/02/cropped-pig-icon-21-32x32.png The Modern Day Settler https://themoderndaysettler.com 32 32 LIVE Calving – Lassie Giving Birth https://themoderndaysettler.com/live-calving-lassie-giving-birth/ https://themoderndaysettler.com/live-calving-lassie-giving-birth/#respond Mon, 15 Feb 2021 14:20:51 +0000 https://themoderndaysettler.com/?p=3973

This past December my new milk cow Lassie gave birth to her highly anticipated 3rd calf. Fortunately, I was able to be there to catch the live calving on video seen below.

Play Video

Lassie’s due date (based on 278 day gestation for a Jersey) was December 2nd, and she ended up calving on the 7th. As soon as she was a day or two over her “due date” I assumed she was carrying a bull calf, and was proven right. My Moocall calving sensor gave me a notification when she had high levels of activity, to ensure that I didn’t miss the big event.

Her calving was about as textbook as it gets. The calf presented in the perfect diving position, and she required no assistance from me in getting him out. She quickly was doting on him and cleaning him off, he stood to nurse, and has been thriving ever since.

Thanks to all of my preparations while dry to prevent milk fever, I am happy to report that we didn’t have any issues. This whole experience truly was as good as it could have possibly gotten for my first calving. I largely have her health and high level of care before arriving here, and my continuation of that during the dry period to thank for that.

My love and deep appreciation for Lassie has continued to grow as she has filled my milk bucket every single day all while raising a strong and healthy calf.


Use discount code "THEMODERN10" for 10% off
]]>
https://themoderndaysettler.com/live-calving-lassie-giving-birth/feed/ 0
How to “Prevent” Milk Fever https://themoderndaysettler.com/how-to-prevent-milk-fever/ https://themoderndaysettler.com/how-to-prevent-milk-fever/#comments Wed, 11 Nov 2020 14:38:23 +0000 https://themoderndaysettler.com/?p=3928

Hypocalcemia also known commonly as “Milk Fever” (MF) is a metabolic disorder that affects newly freshened animals.  It can commonly be seen in goats, sheep, and cows, and is particularly more prevalent (though not exclusive) in dairy breeds. Typically dairy animals that are high producing breeds and/or older cows are most at risk for developing MF. With that being said, there are many factors that can come into play. Some breeds being more prone than others, body condition during gestation/calving, and of course the biggie, nutrition. There is no guaranteed 100% way to prevent milk fever – hence this being my “prevention” plan. Emphasis on those quotations! However, there are many things that can be done to help reduce the chances. When I knew I was going to bring Lassie home, I immediately started working with my vet on a MF “prevention” plan. With some helpful suggestions from Zack at Orb Weaver Creamery as well. Like so many things when it comes to animals, proper nutrition reigns supreme, and is a critical component to reducing the chances of MF.

how-to-prevent-milk-fever

What is Milk Fever?

First things first, Milk Fever is a misnomer, as a fever doesn’t actually present when a cow/goat/sheep is affected by it.  So let’s just get that straight right out of the chute. In its simplest definition, hypocalcemia is ” a deficiency of calcium in the bloodstream”. In a nutshell, what happens is leading up to calving when the cow is dry her body has a low demand for calcium production. This causes the parathyroid hormone that’s responsible for calcium mobilization to go into a somewhat dormant stage of sorts. Then, right around calving, her body has a sudden onset high demand for calcium for the calf and to produce colostrum. This demand is 8-10x more than what her blood requires, and is more than can be achieved through diet. When her body cannot meet the demand, she goes into homeostatic failure. 

Calcium is vital to smooth muscle contractions, as well as proper rumen and cardiovascular function. In its clinical form, the cow can quickly lose control of muscle function. This makes her unable to stand and she goes down, ears go cold, rumen shuts down, abomasal can be displaced, coma occurs, and death can quickly follow. In its subclinical form, the symptoms are not as severe because the disparity between the body’s production and the requirements is not as large. However, it is equally important as statistically it is much more prevalent than clinical MF and is responsible for loss of milk production. The cow is also at a higher risk for infection such as mastitis or secondary metabolic disorders.

The Dry Period

A proper diet to prevent milk fever starts as far back as the dry period.  Most will dry off their cows 2-3 months prior to their due date. This time of no milk production allows the cow to recover from lactation, while putting the nutrients and energy into her growing calf. 

A mistake that can be made during this dry period is that cows are fed the same as if they were still in milk.  This should not be the case. While lactating, cows are fed a high calcium diet to meet their bodies demand whether that be in the form of calcium-rich forages such as alfalfa and clover, a grain ration, and mineral supplementation. As I mentioned previously, while dry, a cows requirement for calcium drops significantly. By continuing to provide more calcium than needed via diet, the parathyroid that is responsible for calcium mobilization goes into a dormant stage. Then when the call for high calcium is put on the body at freshening, the parathyroid struggles to snap out of this latent stage to meet the demand.

The goal during the dry period is to reduce the calcium. So, if you’re feeding alfalfa pellets, stop. If you’re providing a mineral supplement that is high in calcium, stop. If you are feeding out legume rich grass hay and can possibly help it, stop. The key is to reduce calcium intake so that her body goes into a slight calcium deficient state. By being slightly calcium negative, her parathyroid doesn’t go into that dormant stage to begin with. Which means that when her body says “we need a lot of calcium, stat!” it’s already active and can more easily mobilize the calcium in her body and ramp up production. 

At the suggestion of my vet, I am taking all of the measures I mentioned above. Low calcium mineral (1.25%), minimal legumes, no alfalfa. In addition, starting right around the 21 day mark prior to calving, I am feeding out a specific “pre fresh” grain ration. It is specifically formulated to provide the vitamins, yeast, and trace minerals her and her growing calf need, while specifically being designed with MF in mind. Dietary Cation-Anion Difference (DCAD) diets are also popular and something I heavily researched, but my vet suggested that for my single milk cow it was unnecessary and so we went the aforementioned route.

At Freshening

The goal is to provide the best prevention diet during the dry period to set her body up to naturally ward off MF on her own. However, things don’t always work out as planned. Depending on your location, maybe your cow is on pasture when she’s dry that is loaded with alfalfa and clover and you can’t avoid it. It happens. For me, Lassie is dry in late fall/early winter when I am starting to feed out hay, so I have a bit more control over what she eats by feeding out different cuts. 

Maybe you have followed a low calcium diet to the letter, but just want that little extra added bit of insurance. That’s me! I am big on doing everything I can to prevent something (especially as serious as MF) from happening in the first place and if I can spend $20 for something that’s going to make all the difference, I’ll do it.

Bovikalc is a calcium bolus that I will administer immediately after calving, and then again twelve hours later. It has two different types of calcium: calcium chloride for immediate absorption and use, and calcium sulfate for slower absorption and sustained use.  The administration of the bolus will provide the additional calcium her body needs at freshening if her body is struggling to mobilize calcium on its own to prevent the deficiency. It’s like a calcium insurance policy and is $20 very well spent.

Despite doing everything I possibly can to set Lassie up for success and to prevent milk fever, it still could very well happen. There are no guarantees! So, I will still be very diligent and observant of any early signs of MF and will make no hesitation to call the vet. Milk Fever is literally life and death and a cow can go from having cold ears and standing, to down and comatose in an hour. It is nothing to mess around or gamble with.

Like with anything else, there is more than one way to skin a cat. This is the route that I have chosen to go after much diligent research on my end and conversations with my vet. Some may use an oral paste after calving versus a bolus, fine. Some may feed a different diet, that’s fine too. People have different opinions on how things should be done, and I’m certainly not toting my way to be the best or only way, just merely sharing what I do and why. Here’s to a hopefully uneventful calving in just three short weeks!


Happy Calving,

Screen Shot 2019-03-25 at 8.16.29 PM
]]>
https://themoderndaysettler.com/how-to-prevent-milk-fever/feed/ 9
The End of an Era – From Caprine to Bovine https://themoderndaysettler.com/the-end-of-an-era-from-caprine-to-bovine/ https://themoderndaysettler.com/the-end-of-an-era-from-caprine-to-bovine/#comments Sun, 20 Sep 2020 12:32:56 +0000 https://themoderndaysettler.com/?p=3888

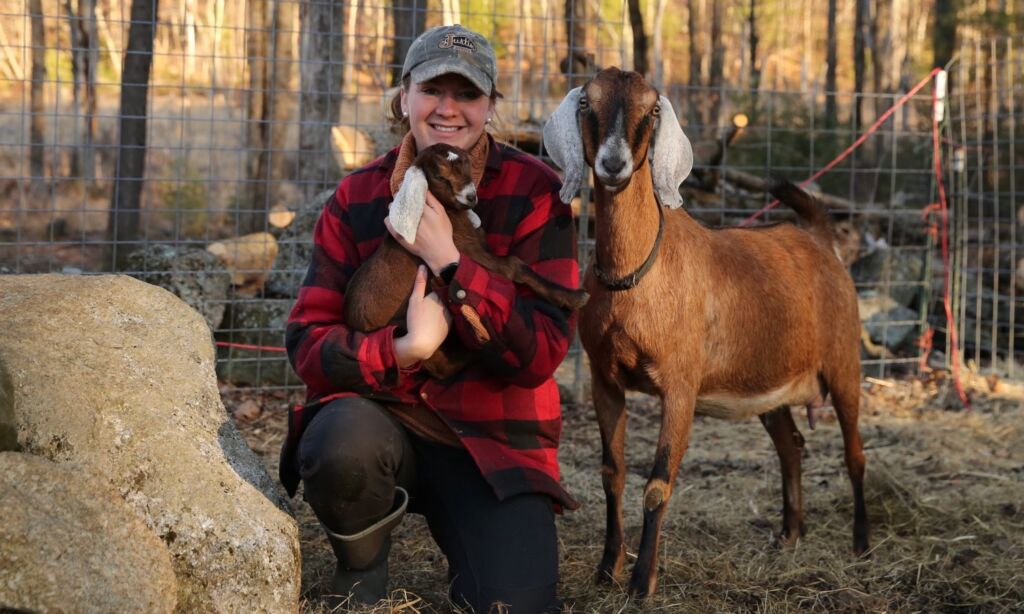
Today feels like the end of an era.  After many talks with my husband, serious reflection, and hard thinking on the direction of our homestead going forward, I sold my beloved dairy goats.  My Nubians Ruby and Rory to be specific, and they are getting picked up today. We originally got started with home dairy a few years ago, and for many reasons we went with goats over cow. They were 100% the right choice for us at the time, and have served us well the past few years.  I owe so much knowledge to them, and they have repaid me with all the milk for delicious recipes.

But, not all animals are permanent.  Some you raise and love, and they are a standing member of your homestead/farm forever.  Others you don’t particularly care for and are here and gone.  While others, are temporary stepping stones along the homesteading journey. They become a source of your knowledge, confidence, and the lessons they teach you and the mark they leave stay with you long after they’re gone. This does not make them any “less”. Dairy goats for me are the latter. I learned so much from them about fencing, housing, and most importantly, keeping a dairy animal. Deciding to sell them was no reflection on them, or anything they did wrong. If anything, how good they are is what made this so much more difficult. It would be an easy decision if they weren’t such good girls.  What it was, was a necessary step to take our homestead in the direction we desire. 

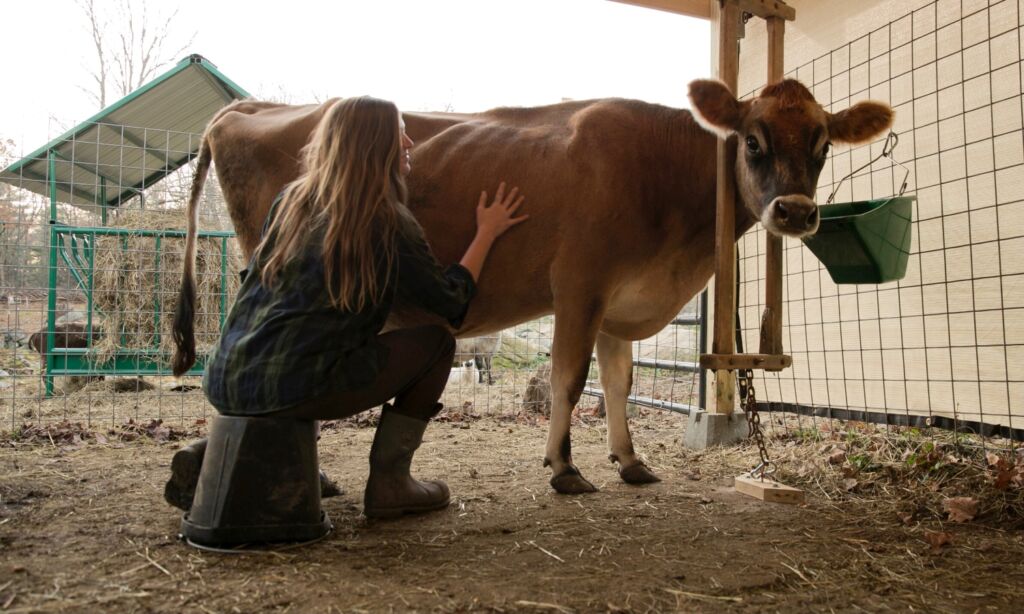
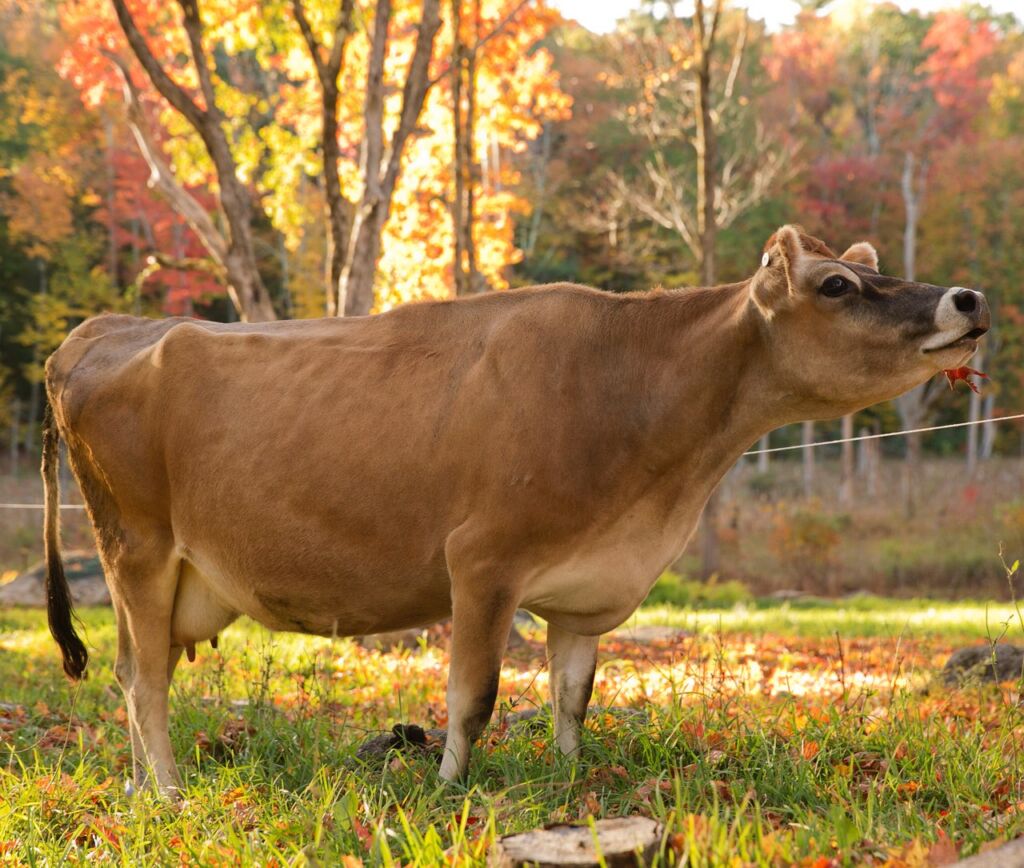
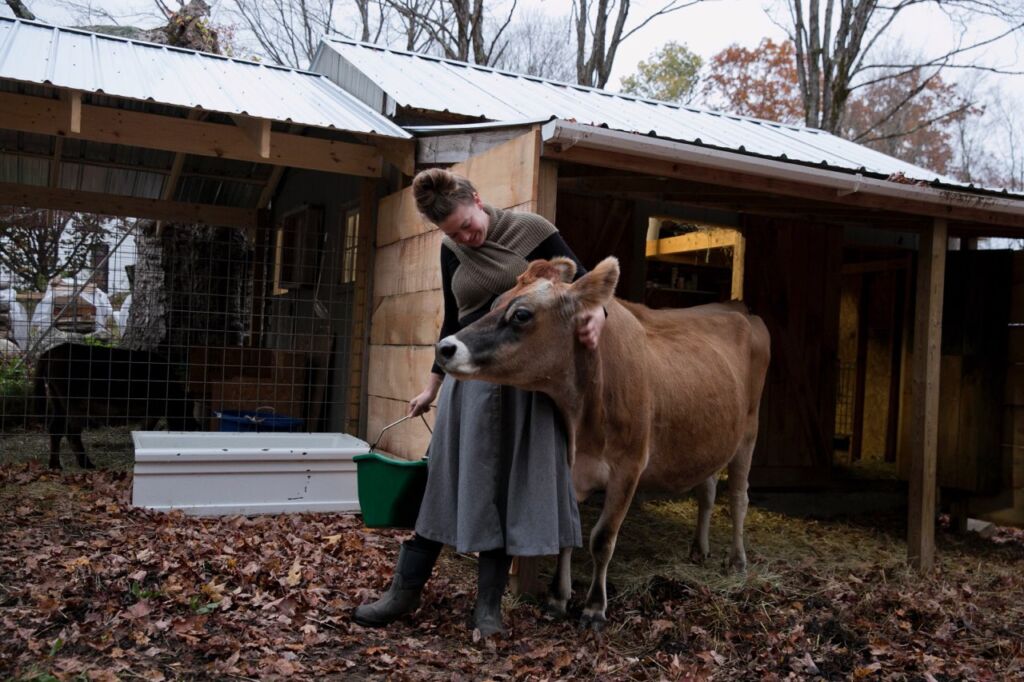
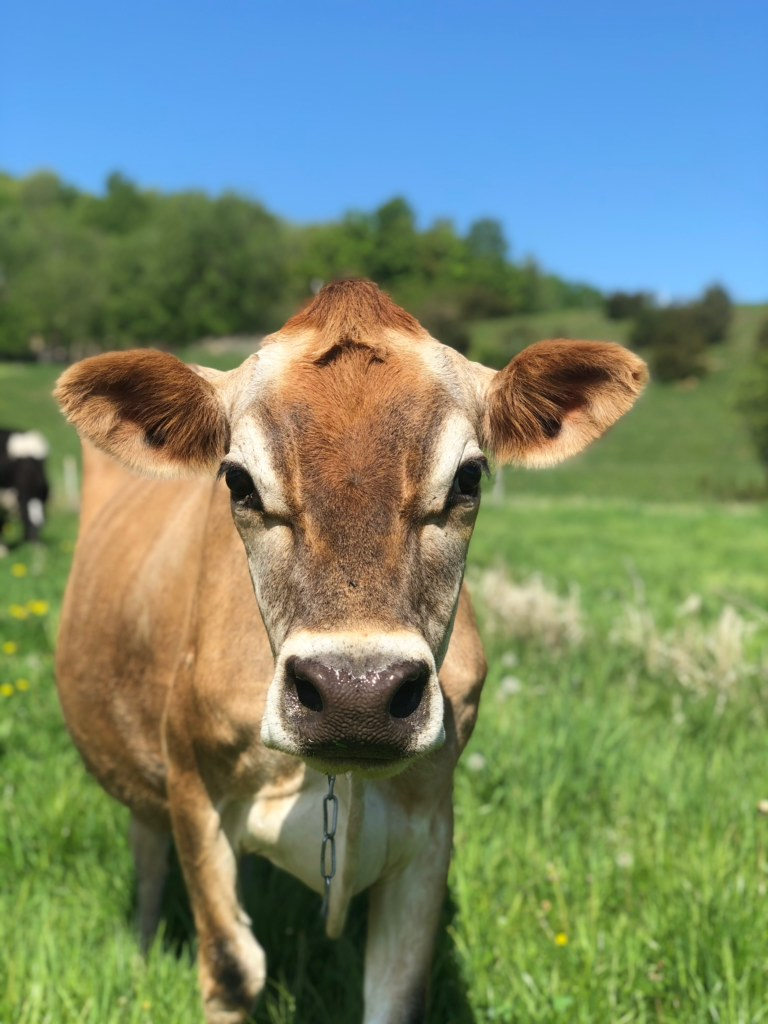
A cow has always been the end goal for us. I want the heavy cream, and the abundance of milk to fatten our pigs and offset our feed costs. We have no allergies or intolerance in our household, so goats are not our only option from a dietary standpoint. But, for all the reasons mentioned in my blog post on our choice to raise goats for dairy, they really were our only logical option before. But, things have changed. After spending a few years clearing our land and creating pasture, and creating even more this year for next spring, we have reached the point where we feel we are able to sustain a dairy cow. 

We are practical people however. We cannot and do not want to have a cow and two large dairy goats that aren’t producing milk. Not to mention our Nigerian Dwarf males I am selling as well. The reason why I am able to give every single one of my animals such a high level of personal care and the best in terms of nutrition, is because I am intentional with who we keep. If I had twenty goats “just because”, the quality of care would suffer. I couldn’t feed organic 2nd cut hay, provide the chelated mineral supplement, or the organic grain ration to that many animals. With greater numbers, the quality of care would suffer. To me, it’s quality not quantity.

Every animal here (except for Wyatt 😉 ) serves a distinct purpose, and we don’t need four goats to help with clearing. Our two Nigerian Dwarf does Audrey and Alison are still needed here for this, and so they are staying. But the two Nubians as well? It just didn’t make sense, so we had to choose.  Pursue a dairy cow now, or continue down the dairy goat road and acquire the necessary breeding stock for our existing does. This would just mean more goats to sell later.  So, we decided it was best for us to bite the bullet and go through this transition now.

It was not an easy decision, but one that had to be made. I know that I made the best decision for us going forward. As far as Ruby and Rory are concerned, before listing them for sale I made them a promise. I would not allow them to be separated, nor would I sell them to a farm that was any less in terms of accommodations they were used to here. I can’t bear the thought of this bonded mother-daughter pair being split up, or them being confined to cramped accommodations.

Not only did I come through on my promise, but I am not ashamed to admit they are moving on to bigger and better things themselves.  They are going to the Remick Country Doctor Museum Farm in New Hampshire where they will become part of their new goat milk CSA program.  Not only are they moving on to a farm bigger than our small homestead, but they will be fulfilling their higher purpose of providing the community with fresh goats milk. They will be well cared for, and have no shortage of attention or pasture to run in. I couldn’t have asked for a better home for my beloved girls.

Send in the Cows

Behind the scenes I have been looking for a Jersey cow on and off for the past few months, and got really serious about it over a month ago. First of all, I cannot get over how difficult of a time I had finding potential quality prospects.  I’m not entirely sure what I expected, but the process has been more difficult than I anticipated. I scoured Craigslist, called farms, asked everyone I knew, put it to Instagram, etc. I came up empty handed a lot.

We had an ideal scenario that we were looking for.  We wanted to avoid a heifer (never calved) at all costs, because we wanted a cow with some experience under her belt. We also wanted to steer clear of a cow that wasn’t already bred back.  I am still working out the details of AI and talking to my vet about it, so I didn’t want to have to scramble. Plus, if an animal hasn’t been bred at this point in September, we wouldn’t be looking to calve until late next summer, which just doesn’t work for us. Why would I want a dry cow during the summer when I have my feeder pigs and quality pasture? 

The biggest part of the hunt of course was the quality of the cow. A family milk cow can serve you for many, many, years in a homestead setting. And if properly cared for, can be productive into their late teens. I want this long term relationship, and wanted to get it right the first time. So, I was doing my homework, asking the questions to weed out the cows that wouldn’t work for us, or had more question marks than answers. I wasn’t afraid to take a pass on a cow I felt was a risk even if it meant not finding anything. 

Finally, the Jersey Cow gods took pity on me and sent me a lead via an Instagram follower (thanks Natalee!) who personally knew some farmers that were selling some of their bred cows. I wasted ZERO time making the 7+ hour round trip visit to Orb Weaver Creamery in Vermont to meet Zack, one of the owners. They’re a farmstead cheese creamery that raises Jerseys, and specifically breeds for udder longevity, high butterfat, and high protein. Check, check, check. Upon my arrival, it took me all of five minutes to decide that I needed one of their cows.

As if the bucolic setting wasn’t enough, I consider myself a good judge of character when it comes to what kind of stewards people are to their animals. Maybe it’s because I’m a helicopter mom myself with my livestock, and am fanatical about their care. So, perhaps I recognize some of these traits in others. Whatever the reason, I see when people care, truly care, and that is reflected in the quality and personality of their animals. While standoffish with me being a stranger, the cows were affectionate and personable with Zack as he showed me around. He knew everyone’s name, age, individual personality quirks, and who would be the best “hand milker” for me in terms of teat size and milk flow. I didn’t just want a cow, I wanted one of their cows.

A Bonny Lass

Based on the personality I was after, the size of our homestead, and being a hand milker, Zack already had a few prospects in mind for me. One of which was Lassie who immediately caught my eye. Lassie or “Lass” as I will surely refer to her as, is a 4 year old cow who is pregnant and due in December.  This will be her third calving so she is old enough to have the experience we were after, but is young enough that she has a lifetime ahead of her of productivity. 

One of the first things that I noticed about her was her shorter stature in comparison to the others. In comparison to other dairy breeds, Jerseys are smaller but can range in size from a mini (which I didn’t want) to a standard size. She is 47″ at the withers, which puts her right in that mid-sized range we were after. Given our smaller homestead, this is the sweet spot.  The other thing that caught my eye was those hand milking teats. One thing Zack cautioned me about just in general education when looking for a cow, is the teat size.  Because so many dairy farms milk with machines, larger teat size has largely been selected against in breeding. While teats will get larger with each calving to an extent, like I experienced with my dairy goats, some just naturally have larger ones than others. This is a mistake I was not going to make twice, and her larger teat size was a major selling point for me.

I left Orb Weaver and thought about Lassie the whole way home. When I got home, I couldn’t stop talking about her or Orb Weaver Creamery to my husband. Then, when it came time to go to bed she’s all I thought about. I woke up the next morning, and put down a deposit on her. She is officially mine.

So, where do we go from here? We are in the process of doing some infrastructure changes in preparation to bring Lass home. When that will be, I am not sure of yet. We are knocking out the dividing stalls of our goat mini barn and opening it up, siding in the overhang, reconfiguring fencing, and figuring out a covered round bale feeder. Lots of moving parts and things happening, but we are very excited about it in anticipation of bringing our first milk cow home.

It is a bit nerve wracking for me, starting over with an entirely new species. But, I know I have a mentor in Orb Weaver, and I will figure things out and make it work just as I always have in the past. I am anxious to start bonding with Lass, and am looking forward to the strong bond we will develop over the coming years. I am hopeful and excited for this new adventure ahead, and hope you will stick around to watch it all unfold!

Moooooooo,

Screen Shot 2019-03-25 at 8.16.29 PM
]]>
https://themoderndaysettler.com/the-end-of-an-era-from-caprine-to-bovine/feed/ 19
Farrowing Barn Tour! https://themoderndaysettler.com/farrowing-barn-tour/ https://themoderndaysettler.com/farrowing-barn-tour/#respond Sun, 30 Aug 2020 22:08:27 +0000 https://themoderndaysettler.com/?p=3867

If you have been following me on Instagram this summer, then you already know we decided to completely overhaul and expand our existing farrowing barn.  We knocked down the right wall, doubled the sized, busted out and re-poured a new concrete slab, hard wired electric, put on a metal roof, and completely redid the fencing and configuration of the paddock. It was a bit of a project, but it is officially complete and it feels great to have such an awesome set up in place.

If you follow closely, yes this farrowing barn is now our third revision.  Our first set up we used when we had zero experience whatsoever.  Some things worked, most things didn’t. Enter our second set up, based on things learned from the first. We tossed out the dog kennel creep and went with the “pitched roof” style, and increased the size. It worked well for us, but there were some functionality aspects that could be improved.  Plus, it was only big enough to accommodate one sow. Because we have retained several gilts for breeding to increase our operation size, we needed something bigger.  Hence the doubled in size farrowing barn.

Below is a video tour where I walk you through the setup. At least as much as I could in the 15 minutes allotted to me by Youtube. If you haven’t already, I encourage you to read the previous posts that I wrote on each version.  We didn’t start out with this set up, it took a few years of trial and error, and failure.  While it may not be perfect, based on our previous experience we think it’s quite fitting for our needs.

We are extremely excited about this new farrowing barn set up and all of the piglets that will be born here in the coming years!

Happy Farrowing,

Screen Shot 2019-03-25 at 8.16.29 PM
]]>
https://themoderndaysettler.com/farrowing-barn-tour/feed/ 0
Farrowing Kit https://themoderndaysettler.com/farrowing-kit/ https://themoderndaysettler.com/farrowing-kit/#respond Thu, 13 Aug 2020 14:59:05 +0000 https://themoderndaysettler.com/?p=3804

Farrowing season is a very exciting time on the homestead, and personally is my favorite of all.  It can be a bit nerve wracking (especially that first time) but just like with kidding, a well stocked farrowing kit is a safety blanket that makes me feel warm and fuzzy inside.  Our vet that “treats” pigs is over an hour away, and to be honest I have more experience with farrowing than they do. I have learned the hard way some of the difficulties and issues that can arise, but I’d be lying if I said that my farrowing kit hasn’t saved piglets lives.

I detail the purpose of many of the items in my kit in my post on caring for piglets from birth to weaning, but not all. And some of the items I discuss in that post are not in my “farrowing kit” because they aren’t relevant to the farrowing or moments surrounding it, but later down the road. In addition to all of the items mentioned in both, there are medications I have accumulated over time that are multispecies and not necessarily “pig specific”. When you raise enough animals, there is a natural build up of medical supplies.

When I refer to the farrowing kit, I am referring to what is by the door waiting for me to grab on my way out when we  have a mama in labor. As always, let this be my disclaimer this is what I use and have accumulated over time.  There may be things that you may need that I don’t use, or vice versa.

What's In the Kit

For the Piglets

  • Mistral Powder
  • Nutridrench for Pigs
  • Iodine with spray nozzle 
  • Puppy Pads
  • Frozen Goat Colostrum and small syringe for administering (not “in” the kit but something that I always have in the freezer in case a piglet needs a little extra help)
  • Livestock Marker for marking litters
  • Chlorhexidene Solution

The mantra around here for any baby being born is “dry, dip, drench, colostrum”. Mistral powder is used to dust on the piglets and dry them off (this is most important during winter farrowing not so much summer or fall), spray their cords with iodine, give them a couple pumps of Nutridrench in the mouth, and make sure they get that oh so important colostrum. The mistral powder is used for drying versus rags or towels, but I do keep some puppy pads in my kit to wipe my hands off as well as to help stimulate and revive piglets that are born close to death.

Chlorhexidene solution is always good to have on hand in any kit in the event of a cut or abrasion. I did have a piglet born with Epitheliogenesis Imperfecta. While it can be severe enough that the piglet should be euthanized, it wasn’t severe enough that didn’t clear up on its own with some antiseptic. It can come in handy.

farrowing-kit
A minor case of Epitheliogenesis Imperfecta that quickly cleared up with Blue Kote

For the Sow

  • Thermometer
  • Chlorhexilube
  • Shoulder length disposable polypropylene gloves
  • Slapshot with various size syringes/needles if you need to administer meds to an agitated or ill sow
  • Oxytocin 
  • Nutridrench
  • Molasses/Corn Syrup
Depending on who you ask, you may get a different opinion on if and when to intervene and assist with your sow during farrowing. Some have a strict hands off standpoint, while others immediately jump in proactively. I find myself somewhere in between. I am not going to sleeve up and go in just because (that poses its own set of risks) but I am certainly not going to stand idly by and watch my sow exhaust herself trying to pass a piglet she is clearly struggling with.
 
With that being said, Chlorhexilube is an antiseptic lubricant that I keep in my kit as well shoulder length gloves should I find myself in a position where I need to assist. Some use a snare, but in my opinion there is no better tool than your hands.  While chlorhexilube is slighty more expensive than standard lube, a little goes a very long way and the antiseptic properties reduce the risk of infection.  It is WORTH it.


 The administration of Oxytocin is another protocol that some feel very strongly for or against.  While I do agree that it is very much mis and overused, there are circumstances where I do believe the benefits outweigh the risks when properly administered.  I try to use it as an absolute last resort measure if I suspect there may be a retained piglet or placenta. For me, if I’m faced with the risk of infection and sepsis in my sow or administering a dose of oxytocin, I’m going with the oxytocin.

 If I think the farrowing is over but I have not seen the placenta pass after quite some time, I will first sleeve up and go in to see if I can feel any piglets blocking the birth canal and pull them. If the birth canal is clear, and after more time there is still no placenta, I administer a dose.  For several minutes after administering a dose, the hormone strengthens smooth muscle contractions which can help pass a retained piglet/placenta.  

Throughout the farrowing I will occasionally give the sow some Nutridrench to help keep her energy up, and give her bumps of selenium that helps release the placenta naturally. You can also use molasses/corn syrup as well, that can be poured into the mouth or rubbed on their gums.  Fortunately we have always had relatively quick labors that only last for 2-3 hours. But, if things aren’t moving along so quickly it can last as long as 8. So, a boost of energy to keep things processing along can prevent stalling.

Generally speaking, when it comes to farrowing for the most part the sow will get the job done on her own.  I however am always of the mentality “I’d rather have something and not need it, than need something and not have it”. Especially considering our vet is largely useless when it comes to farrowing, not to mention over an hour away. Even if they were helpful, the chances of them getting here in time to be of any use are slim. Even more especially since farrowing always seems to happen here during the wee hours of the morning, when no one is awake much less open!

The ideal scenario for farrowing let alone any birthing is that mom does it all on her own unassisted, and without issue.  Obviously this is the gold standard everyone hopes for.  Sometimes no matter how good of a mother you have on your hands, or how good things have gone in the past, stuff just happens. We all need help now and then, and these are living animals we are talking about! We breed pigs to provide a source of feeders for our own consumption, as well as to sell to fund projects on the homestead and offset feed costs.  So, I want as many healthy and live piglets as possible, and if that means occasionally I need to lend a hand, I will do it. It is for this reason that I always have my farrowing kit stocked and ready on hand.

Happy Farrowing,

Screen Shot 2019-03-25 at 8.16.29 PM
]]>
https://themoderndaysettler.com/farrowing-kit/feed/ 0
Vanilla Custard Ice Cream https://themoderndaysettler.com/vanilla-custard-ice-cream/ https://themoderndaysettler.com/vanilla-custard-ice-cream/#respond Mon, 10 Aug 2020 15:52:42 +0000 https://themoderndaysettler.com/?p=3772

If I could eat a single food every day for the rest of my life and never get sick of it (in addition to meat) it would be ice cream.  More specifically, this homemade frozen vanilla custard ice cream. Technically, ice cream and custard are two different beasts.  Ice cream is made with cream and sugar, and must contain a certain percentage butterfat, while custard is cream, sugar, and egg yolks.  Again, meeting the same butterfat requirements as ice cream, but also a percentage of yolk.  But, I don’t get too hung up on the specifics because they’re both ice cream to me, just different types.

But, custard “style” is so creamy, thick, and absolutely lovely that is really is different than regular ole’ ice cream (I love you too ice cream!) It has such an old fashioned taste and I’m completely obsessed. It reminds me of Hanks Frozen Custard, an ice cream stand I used to go to all the time as a kid that has been in business since the 50’s. They exclusively make and churn frozen custard on site and it is out of this world. Thankfully, it’s incredibly easy to make at home with some very basic ingredients. 

Let this be my disclaimer: use the BEST quality ingredients as possible.  While I believe this should always be the case, it is in recipes such as this where it’s minimal ingredients that quality makes all the difference in the world.  Your milk should be full fat, your eggs from pastured birds with bright orange yolks, and your cream should be from cows (or goats) eating that summer grass.  This will make all the difference in your frozen vanilla custard ice cream.

I like my custard to be subtly sweet with the help of a little raw sugar. Good cream will provide the custard with much of the sweetness on its own. I have tried recipes that called for double the amount of sugar I call for, and found it almost inedible.  In my opinion, this combination provides a custard with the perfect amount of vanilla, right amount of sweetness, and oh so creamy taste.


vanilla-custard-ice-cream

Ingredients

  • 2 cups whole milk (cow or goats milk)
  • 8 free range eggs – yolks separated
  • 1/2 cup raw sugar (suit to your taste and cream sweetness! My cow’s cream is naturally much sweeter than when I purchased it previously, and so I use 1/4 cup now)
  • 4 teaspoons vanilla paste
  • 2 cups high quality heavy cream  (**see note below)
**Note, if you have a cream separator and a goat that produces a high butterfat milk, you can use goats milk cream as a direct substitute for cow’s cream.  You cannot straight substitute milk though, and achieve the same results. It will be icy versus creamy, and nowhere near the same. My Nubian is not giving me the butterfat I need to make it worth separating, which is why I source cream from a local farm.

Directions

  1. Add egg yolks and sugar to a medium saucepan (NOT over heat) and whisk until fully incorporated and lightened in color. Set aside.
  2. Add milk and vanilla paste to a separate saucepan over medium heat until it starts to steam. Don’t boil or simmer it.
  3. Temper the eggs by constantly whisking the yolk and sugar mixture and add heated milk a tablespoon at a time at first, working up to a gradual pour.  Tempering heats up the eggs without scrambling them, so add very little initially and work your way up to the whole saucepan.
  4. Return milk/yolk/sugar mixture to stove over medium heat. Constantly stir with a rubber spatula until slightly thickened and coats the back of the spatula. Remove from heat.
  5. Add custard mixture to a sealed container and stick in the fridge. It needs to be completely chilled before using, the longer it sits in the fridge the better! It will be thicker, creamier, etc. Once it’s completely chilled, add the heavy cream and shake to combine. 
  6. Bust out your ice cream maker that you still have yet to return back to your best friend, and add your vanilla custard base to the bowl. Remember to shake it up and get all that vanilla that has settled to the bottom! Allow to churn to your desired thickness, my sweet spot is 20-25 minutes.
  7. Put on your elastic pants, sit back, and prepare for the most delicious frozen vanilla custard ice cream you every consumed.
vanilla-custard-ice-cream

Happy Custard Eating,

Screen Shot 2019-03-25 at 8.16.29 PM
]]>
https://themoderndaysettler.com/vanilla-custard-ice-cream/feed/ 0
A Photographic Love Letter to Lady Crawford: The 1898 Villa Crawford Cookstove https://themoderndaysettler.com/a-photographic-love-letter-to-lady-crawford-the-1898-villa-crawford-cookstove/ https://themoderndaysettler.com/a-photographic-love-letter-to-lady-crawford-the-1898-villa-crawford-cookstove/#respond Tue, 04 Aug 2020 19:35:49 +0000 https://themoderndaysettler.com/?p=2991

In May of 2016, I met the other future love of my life next to my husband and I didn’t even know it.  We were doing the first showing of our house and made our way into the garage. The garage was tidy and neat, and then there under the stairs under boxes of junk I saw her… 

Underneath the boxes was a rusty, dusty stove that clearly hadn’t been used in quite some time.  I knew nothing about stoves, was it busted beyond repair on the inside? Was it worthless? I had no clue.  But I turned my head to our real estate agent (aka cousin) Crystal and said “this stays with the house no matter what”.  Clearly I had already made up my mind we were going to buy the house. I had no idea the deep love affair that would come about.  

Well, we bought the place, and some time passed.  If you follow me on Instagram you know that our place and property has been quite the project and kept our hands full.  Money to restore a stove wasn’t exactly top priority, so she continued to sit in the garage. Unused and covered in boxes. I would go out occasionally, check in on her, give her a good look over, and whisper sweet nothings into her rusty nickel warming shelves.  Her time would come soon enough, but we weren’t quite ready for her.

After several months I started to get curious. I had no idea what I had in the garage, if it could even be restored, and if it could, how much money it would cost. After some quick googling, I found a local stove guy that specialized in antique stove restorations.  Seemed like the man to call.  So, I did and what proceeded felt like an episode of antique roadshow.

“You have a WHAT? Does the number on the back left say 8-20? And it has all of the nickel warming shelves, the side shelf, AND the queens shelf?” David (who would soon become “my stove guy”) was in shock.  He couldn’t believe that not only was I in possession of a Villa Crawford, but that it was complete with all of its shelves, burners, and without any major visual defects or damages. In his over forty years of business, he has seen three…THREE! He demanded I send him some pictures to confirm, and I did.  Turns out that I had a true rare gem on my hands.  I was that person that showed up for an appraisal with some crummy old vase expecting $20, was worth $20,000, and had “no idea what I had”. Turns out I was sitting on a gold mine.  Okay, maybe not that extreme, but still it felt very Antique Roadshow-esque. 

I made it my mission to give this stove a complete restoration, and look like the day she left the foundry. So I saved, and I saved, and saved. I saved for two years. Then, our existing subpar kitchen woodstove developed a major structural and safety malfunction in the late spring of 2018. Not worth repairing, we were in need of another woodstove. It was time for Lady Crawford to shine again.

This stove underwent a complete restoration, down to the nuts and bolts.  It’s more solid than the day it left the Crawford Foundry in Watertown, Mass in 1898.  It was sandblasted to remove all rust and residual paint and debris before being repainted in a period correct finish.  The nickel was re-plated.  Any cracks or breaks within the stove itself were reinforced and welded.  The firebox intended for coal, was converted to wood with an extender added to accommodate longer logs before being reinforced with fire cement.  Each burner that was “worn out” had a metal bar added to allow the handle something to grab onto to lift them.  There is not a corner of this stove that wasn’t inspected, reinforced, and refinished.

A Brief Little History

So you’re probably thinking what makes this stove so special? Aside from the sheer beauty of it, it is pretty incredible.  Prior to 1900 these stoves were functional works of art.  Intricate scrollwork and filigree, with raised emblems, and totally nickeled out.  The amount of detail in this stove is unbelievable.  From 1900 on, the stoves went more steamlined as this was the “modern” direction people were going.  Filigree and raised scrollwork gave way to flat surfaces, and they became pretty plain. Nice functional stoves, but you certainly don’t look at them and go “wow”.  This was what was appealing at the time.  

Now, here we are over a hundred years later and these pre-1900 stoves are highly coveted for their level of detail and “fanciness”. But, the timestamp isn’t the only thing that makes this stove so special.  It is COMPLETE with no missing major components.  Typically, these things got moved around over the past hundred years with the addition of modern gas/electric stoves into peoples kitchens.  These wood burners would get moved out to a garage or barn much like where we found ours.  They get neglected, bumped by a tractor, shuffled and moved around and things get lost.  Most commonly the removable shelf on the right as well as the top “queens shelf” were the most common victims of this.  They are removable, so they easily get bumped off and lost forever.  

Not my Lady Crawford.  I didn’t know it when I saw her sitting there in the garage for the first time, but with the exception of the kick plate and simmer trivet, she was complete.  Aside from the fact that this is such a rare stove to begin with, David could not believe the condition that it was in.  Thankfully being an antique stove restorer, he has quite the cache of random original parts and during the restoration replaced the kickplate and simmer trivet.  Both original Crawford items.

Another incredible thing about the stove? The heat indicator is not only clean and clear like the day it was made, but it works. Due to being exposed to the elements and severe fluctuations in temperature, the glass on these is commonly cloudy and hazy, full of condensation.  And even more commonly, they just plain don’t work.  Despite the stove being kept in a garage for who knows how many years, it is perfectly functional and clear.

A Modern Twist

You know how when you’re burning in your woodstove and you get that awesome bed of glowing red hot coals and you think “man that would be awesome to grill over?”.  Well, with one little modern twist you can! 

David has a cast for the standard opening seen in Crawford and Glenwood Models where the two burners over the firebox lift up and out.  So, what did he do? He made a grill insert that fits perfectly over the firebox.  The ductile iron pan is slightly pitched down to allow the juices to collect in the reservoir on the left side with a pour off spout.  Once you get a good bed of coals, you open the drafts (this will suck any smoke down, out, and up your chimney) throw this baby on and you can get your grill on in the middle of winter.  Wood fire grilled chicken breasts in January by the comfort of my warm stove? Yes please!

Another incredible invention that didn’t come about until several decades after this stove was made, was the multi burner lifter.  Wood is loaded into the firebox from the top, and there are two burners and one middle plate to remove in order to load.  When this stove was built in 1898, the only way to load was to individually lift each burner and the center plate out with the single lifter, load, and then put each one back.  So, we are talking six lifts per load.  Tedious much? Post 1900, and don’t quote me on this but I wanna say it was around the 40’s, a new lifter was invented that allowed you to lift all three at once. You have a good enough grip to be able to hold it as you load your wood and then place it back.  Amazing how such a simple design can make such a difference in the practicality and use.

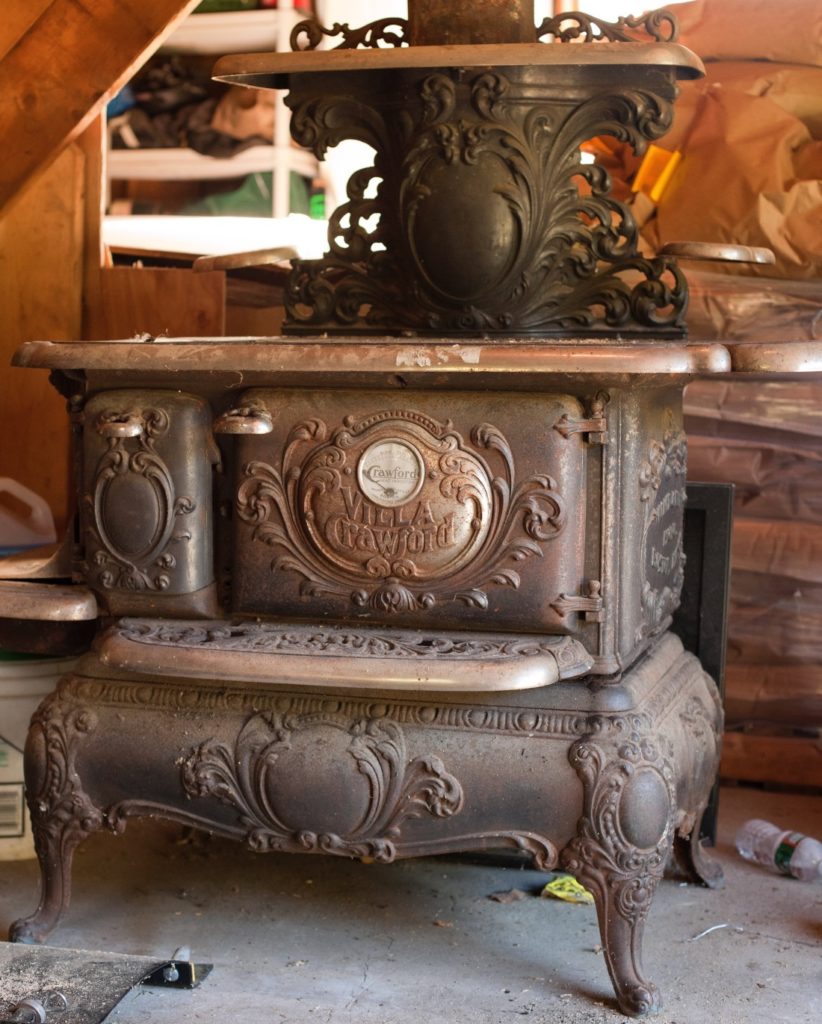
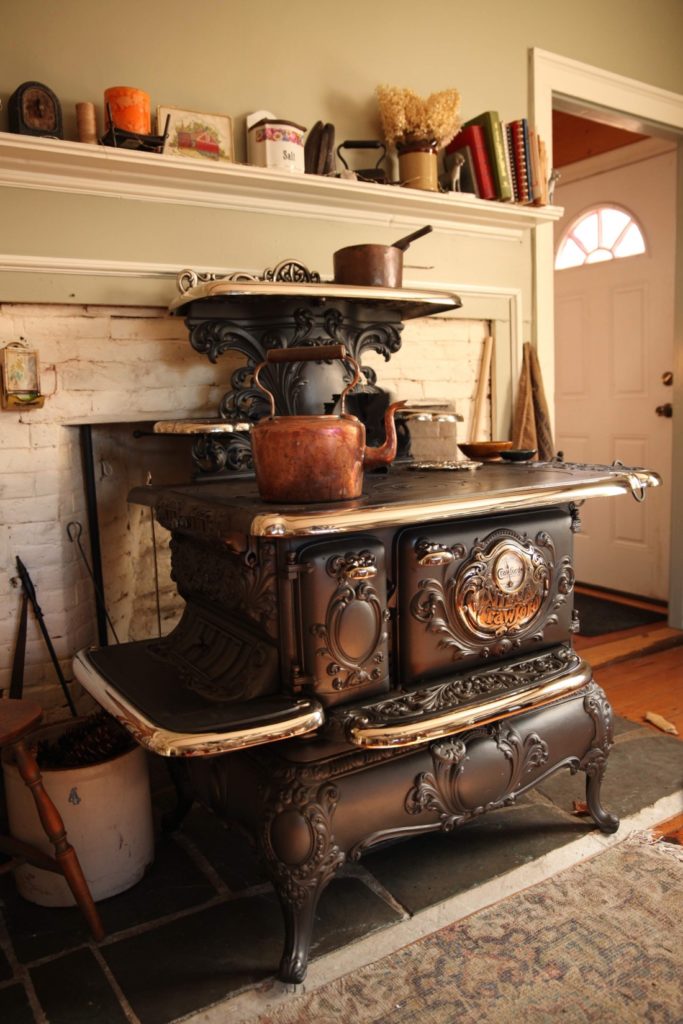
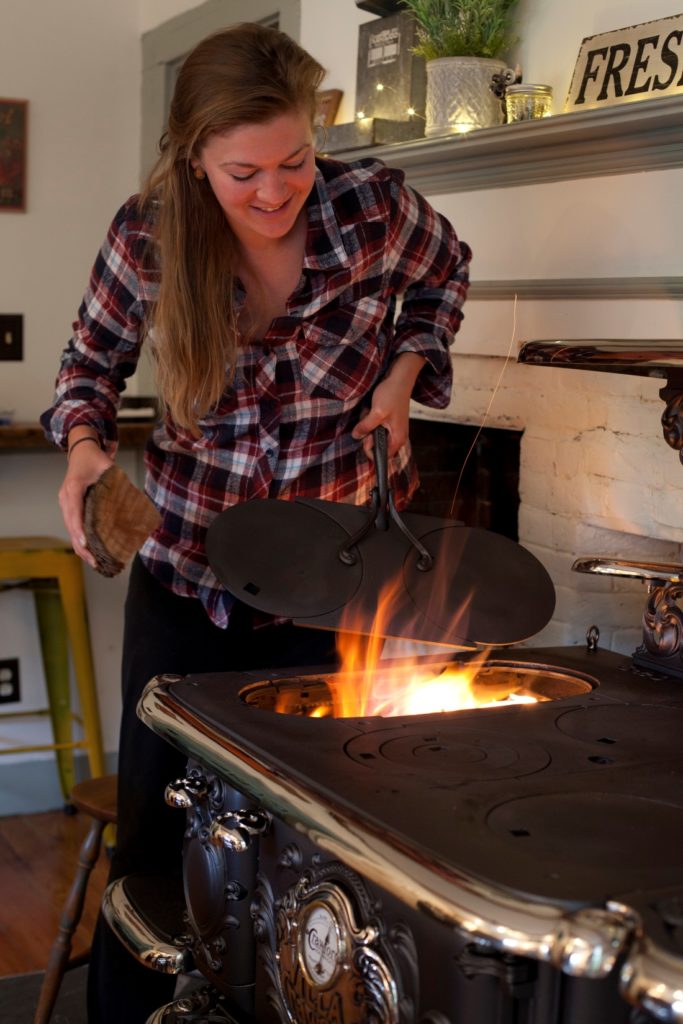
My love for this stove knows no bounds, and I am just as amazed by it two years later as I was the day it came back from the restoration. I told my husband that my final wish is to be cremated in it 😀  

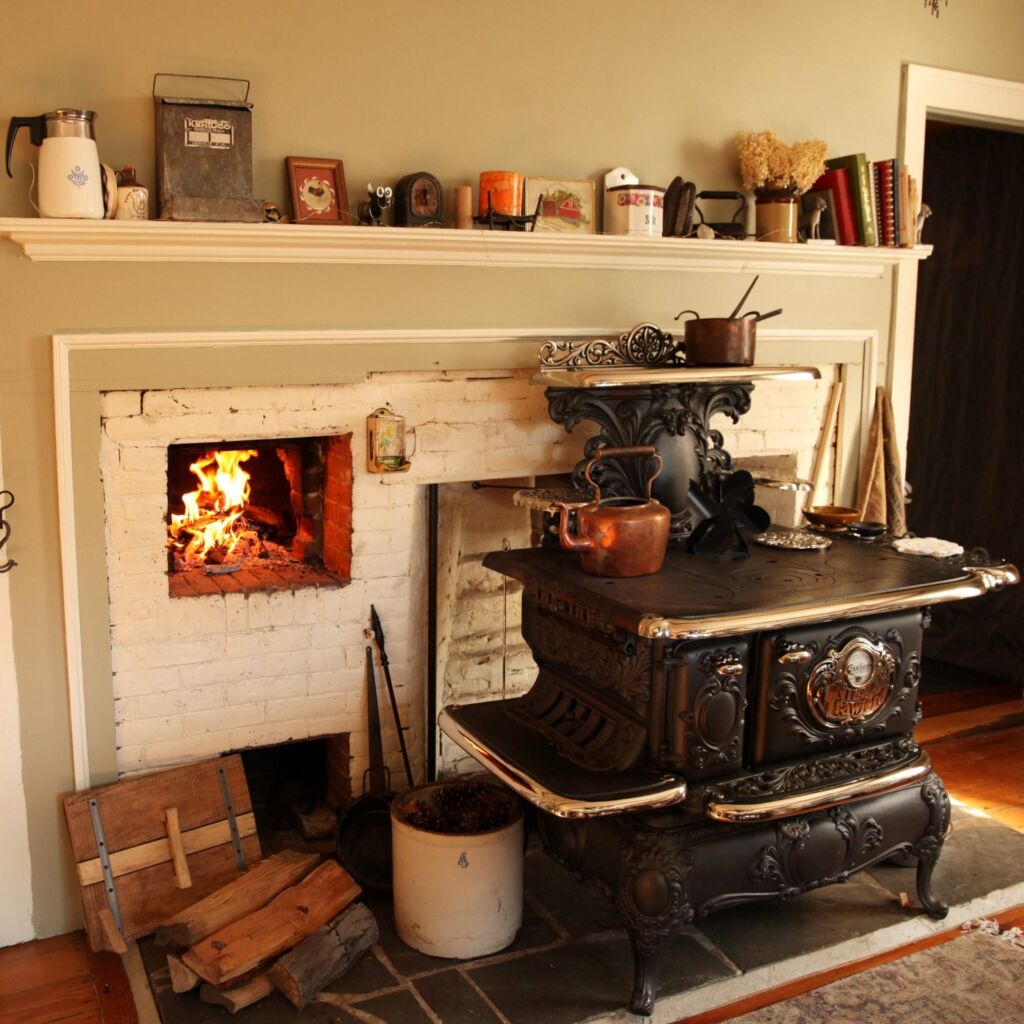
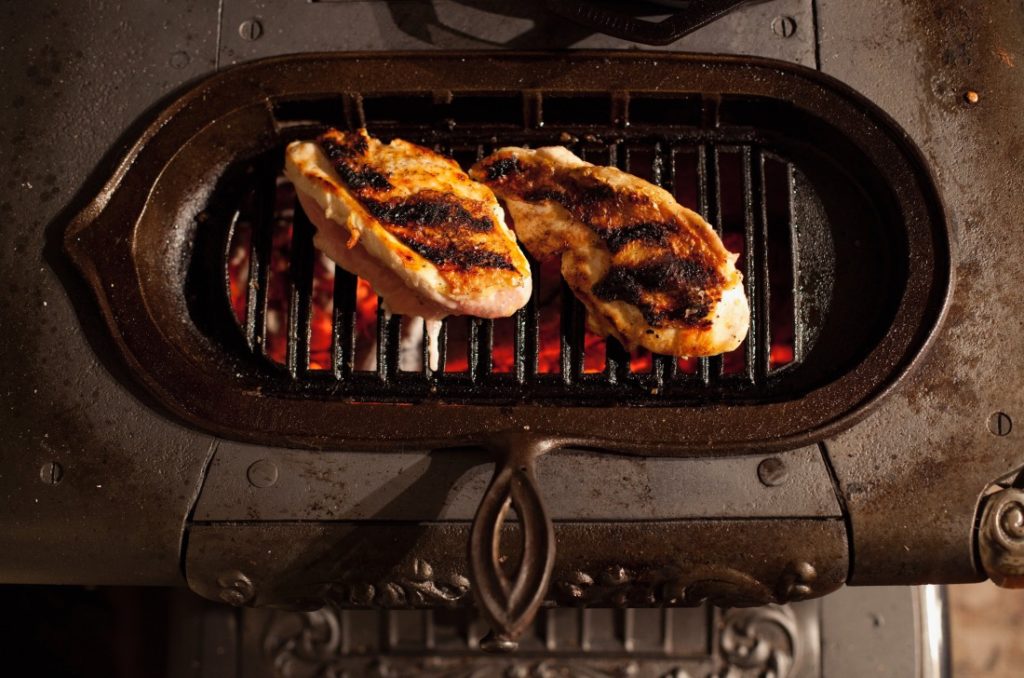
The number one question I get asked is it’s it horribly inefficient? People equate old to inefficient or subpar. I will fight anyone on this topic – modern stoves have nothing on this girl. This is coming from the person who ripped out two Woodstove Soapstone stoves to put in hundred year old Crawfords.  They just cannot compare in craftsmanship and design. Its design turns it into one big cast iron radiator that allows it to pump out the heat as well as the food all winter long.  The best seat in the house is right next to the stove, and is usually where you can find me with knitting needles in hand.

If you’re interested in a video walk through and the ins and outs of how the stove works, what does what, etc, I highly suggest you check out my IGTV video walkthrough below, and all things #villacrawfordstove on Instagram.

]]>
https://themoderndaysettler.com/a-photographic-love-letter-to-lady-crawford-the-1898-villa-crawford-cookstove/feed/ 0
Ways To Preserve Tomatoes https://themoderndaysettler.com/ways-to-preserve-tomatoes/ https://themoderndaysettler.com/ways-to-preserve-tomatoes/#comments Sun, 26 Jul 2020 22:18:57 +0000 https://themoderndaysettler.com/?p=3716

There are loads of different ways to preserve tomatoes. I don’t know if there is another vegetable that is as versatile when it comes to canning as the homely tomato. While I may be largely falling out of love with gardening the more I raise my own meat, there are a few staples that I will always grow for storage and/or preserving. Onions and potatoes for storage, corn for freezing, and tomatoes for canning. 

My Nana is the one who taught me how to make sauce several years ago, and to this day I still do it the way she taught me.  Like pretty much everything else in my life, I have taken the foundations I was taught and expanded upon them.  This has led me to new varieties of tomatoes as well as new preparations for me to preserve.

  I preserve different tomato types in different ways depending on which they are best suited for.  Some make better sauce, others hold their shape better for diced, whole peeled, etc. You will find what varieties you enjoy growing most and for what purpose.  Like anything else worth doing, it’s as lot of  work, but having shelves full of every type of tomato style you need in the dead of winter cannot be beat!  

This post is not a “how to preserve” post that tells you how to can every different type. But, a post to highlight some different ways to preserve tomatoes.  Hopefully this gives you some new ideas you have never tried before

ways-to-preserve-tomatoes

Types of Preserves

    • Sauce:  I would say that this is the most versatile of ways to preserve tomatoes. For sauce, I reserve my family heirlooms for their tenderness, incredible sweetness and flavor, as well as paste types for added thickness.  I can my sauce plain/unflavored that way I can use it for whatever I want. Spaghetti sauce, pizza sauce, lasagna, goulash, ratatouille, soup, the possibilities are endless! Sometimes you want it spicy, sweet, or a little acidic. I don’t want to box myself into a flavor profile off the bat! Not to mention tomatoes are not the same year after year.  Depending on the garden season’s weather, sometimes they’re naturally sweeter, other times they’re more acidic.  There is no “one size fits all” recipe that will work year after year.  Also, flavors develop as they sit on the shelf in the jar, and I may not like what I get.  I prefer to incorporate fresh flavors after I’ve cracked that jar open and taste as I go depending on what I’m making.
ways-to-preserve-tomatoes
    • Diced:   Another pantry staple for everyone, diced tomatoes come in handy for anything and everything (read versatile!).  Rice dishes, slow cooked meats, soups, stews, or even a chunkier sauce can all use diced tomatoes.  For these, a firmer tomato is ideal, as it will hold its shape during the dicing and canning process. 
    • Crushed: Now, this is where things get a little tough on distinction.  Crushed versus puree, well, I don’t see the difference with store-bought .  Some say crushed are chunkier, whereas puree is well, pureed!  But, I have had my fair share of “crushed” tomatoes that are a distinct pureed consistency, much like my sauce.  So in my world crushed = chunky.  Whole peeled tomatoes, cooked down and pulverized with the potato masher into a chunky, yet soft consistency. Crushed can be used in many of the same dishes as diced, so I used the same tomatoes with a few family heirlooms thrown in the mix.  The crushed aren’t as firm as the diced, and are a saucier consistency rather than the distinct diced tomato pieces. Think somewhere between a sauce and diced.
    • Whole Peeled: Whole peeled definitely have their own place in certain dishes where you want the distinct whole tomato intact.  I use mine in thick stews, pulled chicken, certain pasta dishes, and mexican rice.  For whole, San Marzano or another type of paste tomato is ideal because they are firm, have minimal seeds and gel, and don’t break down when canning. They hold their shape and hold up well to all the handling and heat through the blanching and canning process.  They are a pantry must!
    • Salsa:  Salsa is much more than just a delicious dip for tortilla chips.  It can also be added to burrito bowls, as well as pulled chicken or turkey!
    • Soup:   I absolutely love tomato soup.  Combined with grilled cheese in the dead of winter, it makes for one of my all time favorite comfort foods. I have a very particular taste for it though, and I don’t like it “vegetably”.  For me, tomato basil soup is the only way to go.  I have always made it in the middle of winter as I need it for dinner, but the problem always is I don’t have fresh basil in the middle of winter! Which means I have to go to the store for just basil (because everything else is a pantry staple!) which is just annoying.  So this year I thought, why not make a big batch and can it now while basil is abundant and save the headache later? Well I did, and I am so glad I did!!
    •  
ways-to-preserve-tomatoes

This is far from an all inclusive list of all the ways to preserve tomatoes.  I didn’t even touch on dehydrating ( I don’t do it) but I know people are a huge proponent of it. Hopefully, I highlighted a different preserves you never thought to try before that you can experiment with this canning season!

Happy Preserving,

Screen Shot 2019-03-25 at 8.16.29 PM
]]>
https://themoderndaysettler.com/ways-to-preserve-tomatoes/feed/ 2
Handspinning & Reflecting By the Pasture https://themoderndaysettler.com/handspinning-reflecting-by-the-pasture/ https://themoderndaysettler.com/handspinning-reflecting-by-the-pasture/#respond Thu, 23 Jul 2020 13:22:42 +0000 https://themoderndaysettler.com/?p=3712

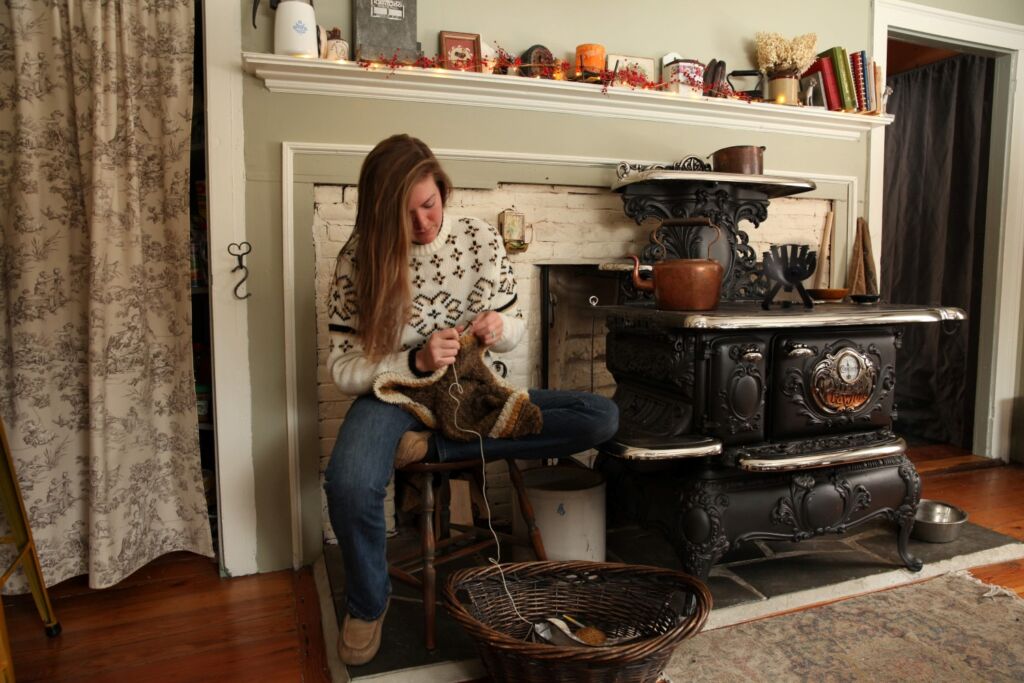
There is no question that we are incredibly busy on our small homestead. Between working our “real jobs” full time, taking care of our slew of animals, clearing, cutting wood, putting up fence, etc, we have a tendency to always be doing something. But, there is always work to be done. I used to feel guilty if I would want to just sit and relax for a short break. I would try, but then all I could think about is the things I should be doing, which made me anxious, unrelaxed, and then I would just get back to work.  

Recently though, things have shifted. There is still plenty to do around here at all times, but we are more established than we were two years ago or even last year.  We have pasture established, fences, and systems in place. While there will always be wood to cut and animals to tend to, we have reached a point to an extent that with some things we are in “maintenance mode” rather than “getting established mode”. 

It’s because of this we are able to sit back and ENJOY what we have worked so hard for from time to time. Don’t get me wrong, we enjoy the benefits from our animals year round whether it be their company, entertainment, meat, or milk they provide. But, there really is something about just sitting and observing them in their element we have worked so hard to give them.

For me, one of my favorite ways to relax and take in and enjoy all of our hard work is to spin on our patio overlooking the pasture. I can watch the sheep, the grass, and spin up some yarn.  This is me we are talking about, so I still have to be doing something “productive”at all times, and creating yarn fits the bill 🙂 It’s incredibly relaxing, and is a wonderful way to soak in all of the fruits of our hard labor.

Below I have a recording of a recent soothing spin. Nothing but wind, birds, a visit from the sheep, and the metronome rhythmic click of my vintage wheel. A little spinning therapy does the soul good.

Happy Spinning,

Screen Shot 2019-03-25 at 8.16.29 PM
]]>
https://themoderndaysettler.com/handspinning-reflecting-by-the-pasture/feed/ 0
Fencing for the Homestead https://themoderndaysettler.com/fencing-for-the-homestead/ https://themoderndaysettler.com/fencing-for-the-homestead/#comments Thu, 16 Jul 2020 15:07:15 +0000 https://themoderndaysettler.com/?p=3676

It is no secret that we utilize every single animal we have to clear our land, fertilize, and produce delicious food in the process.  Each animal is at the very least dual purpose, some tri, some quad! In order to do this, proper fencing for the homestead is paramount. 

Our Icelandic Sheep rotationally graze our pastures and fertilize while producing delicious grass fed lamb and fleece.  The pastured meat chickens follow the sheep, and scratch and peck through the freshly mowed grass while dropping their nitrogen rich manure. Our dairy goats clear brushy and overgrown areas to convert into milk. Then, our wonderful pigs till and turn over the soil in our woods in preparation of converting it to pasture while packing on the pounds with all of the forage the land has to offer. Before fulfilling their higher purpose of feeding us, our animals heal and reclaim our land.

With all of these animals moving around in different frequencies and areas of our property, it can be a complicated choreographed dance.  Through this, we have gotten quite skilled at fencing and have accumulated many different types as we have fine tuned our processes.  I have touched several times on fencing for the homestead as it pertains to our different animals specifically. But, I figured I should break it down for each animal in one comprehensive and digestible post to refer back to. 

General Set Up

Understanding what we use and how we use it will probably be easier if you understand our set up.  My (crudely) drawn map below shows an aerial view of our property, with different colored lines each representing a different animal’s area. PS it is soooooo much more open now, I can’t wait for a google earth update!

  • Aqua X: Location of our AC electric fencers. One in the goat barn, one in the garage. Each one feeds its side of the property with power via travel lines to allow us to easily hook up our netting to
  • Red: this is our “new” sheep silvopasture that we have recently reclaimed from thick overgrown woods. The entire perimeter is fenced in with permanent perimeter fence and has an electric travel line that runs along the inside.
  • Blue: Goat silvopasture off of the barn. Perimeter is fenced in with a combination of a couple different types of permanent perimeter fencing. This is the first area we established when we moved here.
  • Yellow: Our pigs areas (both feeders and breeders) The area off the farrowing barn has permanent perimeter with a training line of electric on the inside. Everything else is 100% electric.
Red: Sheep Blue: Goat Yellow: Pigs

Sheep

The sheep without question are the most frequently rotated animal we have.  Because we want grass fed lamb, we rotate our sheep everyday to fresh ground. This way they have as much as they can eat that particular day, but don’t stay in a place long enough to over graze and stunt our pasture growth. They move around our newly created pasture (red) that we break up into paddocks with our netting, as well as the front and side lawn, logging trail, and anywhere else we can stick them.  If there is a travel line to hook up to nearby and there is grass, we will put them there. Each year we are creating more pasture, which gives us more opportunity to graze. The frequency of rotating the sheep would be impossible without the use of electric netting and the tools we use.

  • Permanent perimeter fence: Red Brand Sheep & Goat Woven Wire 4×4 Square 48″ high with a galvanized travel line running along the inside via T-post insulators
  • Premier One Electric Netting – my life will never be the same after discovering this. This netting is essential for us for easy rotation and security of our animals
  • Premier One Power Links – allow you to quickly connect two strands of netting together, gate to the netting, or netting to travel line. We have about ten of these, we use them everywhere!
  • Premier One Gate – easy electrified gate that comes in different widths for either walking through, or driving a side by side. Depending on set up this can be extremely handy.  
fencing-for-the-homestead

Goats

The goats are rotated less frequently than the sheep. I try to keep them as close to the barn as possible due to milking, so they spend most of the time in their blue pasture. However, there are several times in the summer when we put them to work clearing a stone wall or some brushy areas. When we move them around, they are contained by the same Premier One netting as the sheep.  Their blue pasture is surrounded a hodge-podge of permanent perimeter fence. Some we bought initially and have since replaced because it was the wrong kind, some we got for cheap, some we got for free. Below are the different types we have ripped from another blog post:

  • Cattle Panels:
    • Feedlot panels (6′ x 16′):  These are by the far the most expensive panel I have ever seen or purchased, but in the small paddock directly off the back of the stalls of the barn this stuff is what encloses it.  This panel is tall enough to deter anything from jumping over (whether that be out or in) and the squares are so small the entire way up that even the smallest Nigerian Dwarf baby goat can’t squeeze through.  When the kids are very young they don’t get to go out into the big pasture quite yet, so they stay in the smaller paddock with mom.  This allows them to be truly contained and safe.
    • Feedlot hog panels (50″ x 16′):  These are cheap at a local TSC in comparison to the aforementioned Fort Knox grade panels.  These are used in approximately half of our big pasture and make setting up fencing really easy and are much more aesthetically pleasing than spooled fencing.  They also have small enough squares on the bottom half of the panel to keep babies from slipping through.
  • Woven wire: Used in approximately half of my large pasture for the goats.  It can be a little bit of a pain to get set up because you have to do a lot of pulling and stapling to prevent a saggy fence, but it does hold up very well to rubbing and is cheaper than panels if you’re fencing a large area.  My recommendation is to get the tallest one you can to deter jumping, and with the smallest squares. We use Red Brand 48″H 4″ x 4″ square.  If you end up getting goats with horns, if they can stick their head through they will get stuck and can strangle themselves.  Small squares keep this from happening and help prevent baby goats from being able to slip through.

Pigs

I talk a lot about using our pigs to clear our land and how big of a difference they have made in turning overgrown woods into pasture. This year we opened up a new wooded pasture for our breeding stock yellow pasture that’s on “top” of the map.  This is a virgin area of woods that we fenced in with our three strand polywire set up. The girls have been digging, rooting, and turning over the soil for us and come fall after they’ve been moved back to the farrowing area, we will come in and drop trees, rake, and seed or bale graze this winter. The yellow pasture that’s on the “bottom” of the map is also fenced in with our three strand polywire set up. This is a heavily wooded area that we rotate our feeder pigs through. Just like with the goats, we use a combination of different types of fencing for the pigs depending on where they are physically, as well as their stage in life.

  • Farrowing area: off the back of the farrowing house we utilize 34″ x 16′ long hog panels to fence in their farrowing pasture. We have a single line of polywire that runs along the inside for training purposes.
  • Premier One Hog Netting– we utilize this netting for training piglets on electric fence
  • Three strand polywire set up – once the pigs are sufficiently trained, they will be contained with this set up from thereon out.
train-piglets-on-electric-fence

Meat Chickens

The meat chickens are kind of the unsung heroes in terms of the power they posses to transform your land.  After seeing with our own eyes the incredible difference their manure makes in pasture grass growth, we have become obsessed with utilizing them as much as possible. Thanks to our mobile chicken coop, we are able to easily move them wherever we feel the pasture needs a little something extra in terms of fertilizer.  They scratch and peck around, nibble on greens, pack on the pounds, and drop their gold-like manure onto our soil.  Like anything else it’s about finding a balance. The frequency with which we rotate varies greatly depending on their size, and the condition of the paddock they’re on. You want them to be on a particular piece of land long enough to make a positive impact but not a moment longer. They leave the land richer than they found it. Just like any other frequently rotated animal, we would be lost without the use of our electric netting:

fencing-for-the-homestead

We have learned a lot over the past four years here and have fine tuned and improved our methods as we have become more established. I like to think of myself as a bit of a fencing connoisseur, and it is one of my favorite things to do. It didn’t always use to be so easy moving this many animals though! Through the use of quality fencing for the homestead, we have a good system in place and strong fencing to keep our animals contained and safe, while improving the quality of our land in the process.

Happy Fencing,

Screen Shot 2019-03-25 at 8.16.29 PM

**Some of the links on this site are affiliate links. I only link to products I have used, abused, and believe in.  While I do not make commissions on these, they do allow my partners to track business I have generated for them. I wholeheartedly appreciate you using my affiliate links for any of the products I recommend you may purchase! You make me look good, and it keeps the educational and informative content coming.

Proud Premier 1 Partner

]]>
https://themoderndaysettler.com/fencing-for-the-homestead/feed/ 6