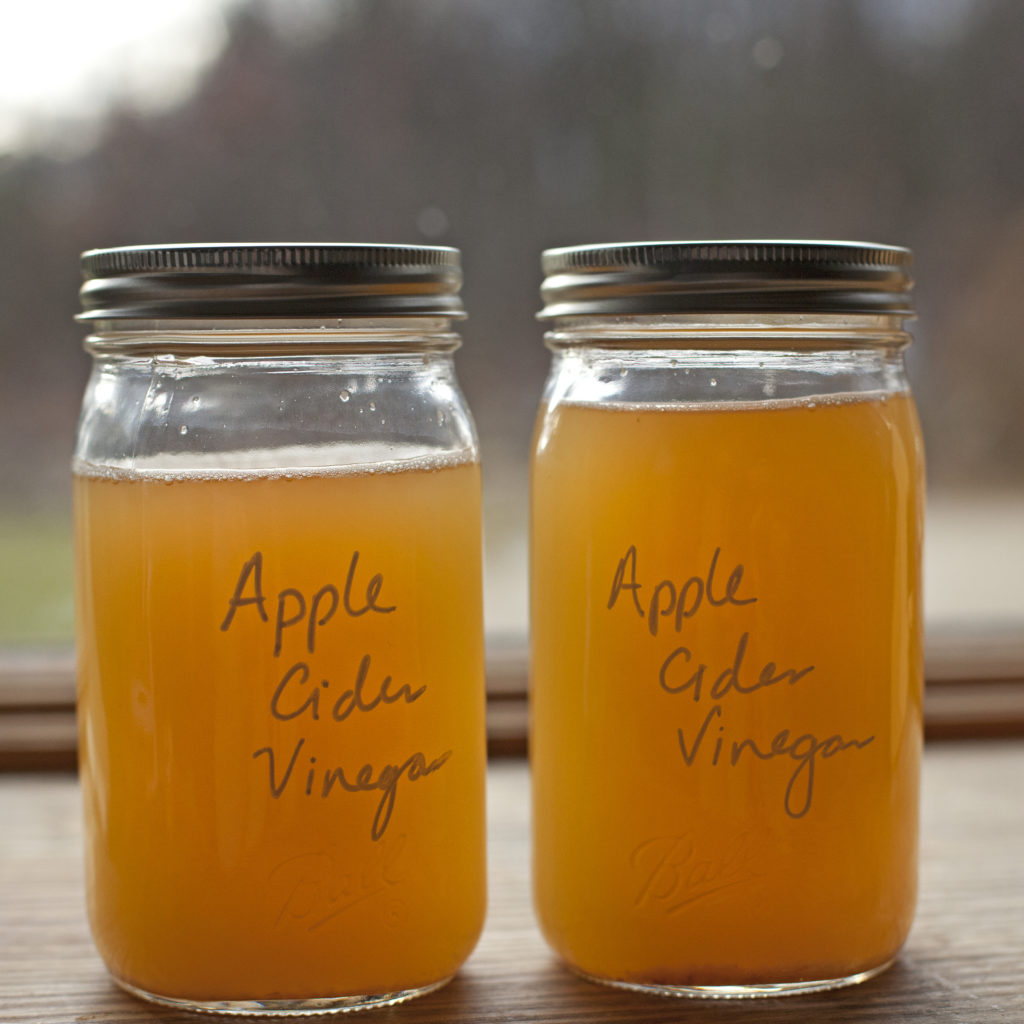
There is no denying the laundry list of health benefits to raw, unfiltered, apple cider vinegar. Whether it be used for cosmetic or internal purposes, a simple google search will yield millions of reasons why you should add it to your diet or beauty regimen. I personally have used it for years on my hair and face, as well as a substitute (in most cases) for plain white vinegar in recipes. The stuff is just plain ole’ good, and good for you. I always bought Bragg’s with “the mother”, because if you’re going to buy it, in my opinion it really is the best. But a couple years ago during apple season I thought shoot I can just make it myself no problem! So, I did! And it really is as easy as I detail below. All it takes is some patience and you can have homemade, raw, unfiltered, apple cider vinegar with that wonderful “mother” at your fingertips! Give it a try and see for yourself.
If you’re relatively new to the ACV world and aren’t familiar with “the mother” let me enlighten you. The mother is what makes ACV so awesome, and houses all of the nutrition and benefits. Without it, well, you would have filtered apple cider vinegar and I can’t imagine such a world. It’s the cream to milk, the fat to a ribeye, the whey to yogurt! Without it, ACV would lose what makes it so incredible. It is that floaty, chunky, wonderful goodness that settles at the bottom of a jar and is a byproduct of the fermentation process.
The process of making ACV is just simple fermentation. All you need is some apple cores/peels/whatever apple scraps you have, some water, raw sugar, a jar, and time:
- Collect any peels, cores, or other apple scraps you have collected. Place in a sterilized mason jar (of any size depending on how many scraps you have) and fill the jar 3/4 full with scraps
- Make a simple syrup with a ratio of 2 tsp raw sugar dissolved in 1 cup of water. So if you are making your ACV in a quart jar which is four cups, I figure a 3 cup simple syrup solution is needed. Pour your simple syrup solution over the apples leaving a few inches headspace, pushing down and around the inside of the jar with a knife to remove any air bubbles. If needed add more simple syrup so the apples are completely submerged. This is key! The apples have to be submerged at all times, otherwise this can promote mold growth which would require you to pitch the entire contents of the jar.
- The keep the apple scraps submerged you can buy fancy fermentation lids that hold contents down with a valve on top that allows fermentation to happen. I don’t have those and really don’t see the need. So, I put a bunch of pie weights in saran wrap and twist it up nice and tight and place it in the jar on top of the scraps. Give it a firm push down, and this will weigh down the scraps keeping them below the simple syrup level.
- Place a breathable top (I.e paper towel, coffee filter, cheesecloth) over the top of the jar and secure it with a rubber band or jar ring. I personally double layer, because as fermentation happens you will bring fruit flies out of the woodwork. A double layer will prevent them from getting into the jar.
So now that your jar is assembled, you want to put it in a relatively warm and dark place (I used my kitchen pantry on a high shelf) and pseudo forget about it! The first few days check on it, as you want to make sure that the apples are staying submerged in the liquid. If not, add more weight. This is the key part that can cause this to take a hard turn towards the trash. If you see bubbling and a scum forming at the top – wonderful! That’s fermentation and mother forming friend.
Let that baby sit for 3-4 weeks in that same relatively warm and dark place then remove the apple scraps. It should have a sweet smell at this point. I poured the contents of my jar out into a colander over a bowl, then added the strained liquid back into the same jar. Replace with the same breathable covered top and put back into the same relatively warm and dark place. Then forget it about it even longer! Let it sit for a month or so, go over and take a whiff through your breathable top. Does it smell vinegary? If it does, good for you, you have a warmer house than me and it fermented a little quicker. Does it still smell a tad sweet? Then let it sit another week or so and check on it again. Once it has that distinct vinegar smell, take a spoonful of that bad boy and give er’ a taste. You’ll know if it’s vinegar or not! Once you have achieved the vinegar state, recover with a sealed lid and put it in your pantry and enjoy!
When making your first batch of ACV, you are also “creating” the mother. Because of this, you want to use raw sugar, and you also will likely not get a large amount of mother in your first batch. However, when you make your second batch, you should reserve some of your ACV from the first batch to add to the second replacing some of the simple syrup to kickstart the fermentation process and make a stronger mother culture. You could also use some store-bought (raw, unfiltered, with mother) such as Bragg’s in your first batch to make that first mother strong as well. Either way, as long as your keep your apple scraps submerged, and your jar in a relatively warm and dark place, fermentation and the mother will happen and you will create some delicious and good for you homemade raw, unfiltered, apple cider vinegar!

Thank you. Just put my first batch on
YES! Best of luck, I need to start collecting some scraps to make a fresh batch I’m almost out!
Do you need to use organic apples?
This is awesome ~ I hadn’t thought about trying to make my own! Question though, with the apple cores, should I flick out the seeds?
No it will all strain out in the end, don’t waste your time!